See the iPhone Invoicing Flow
From creating a client to previewing and sending a professional PDF
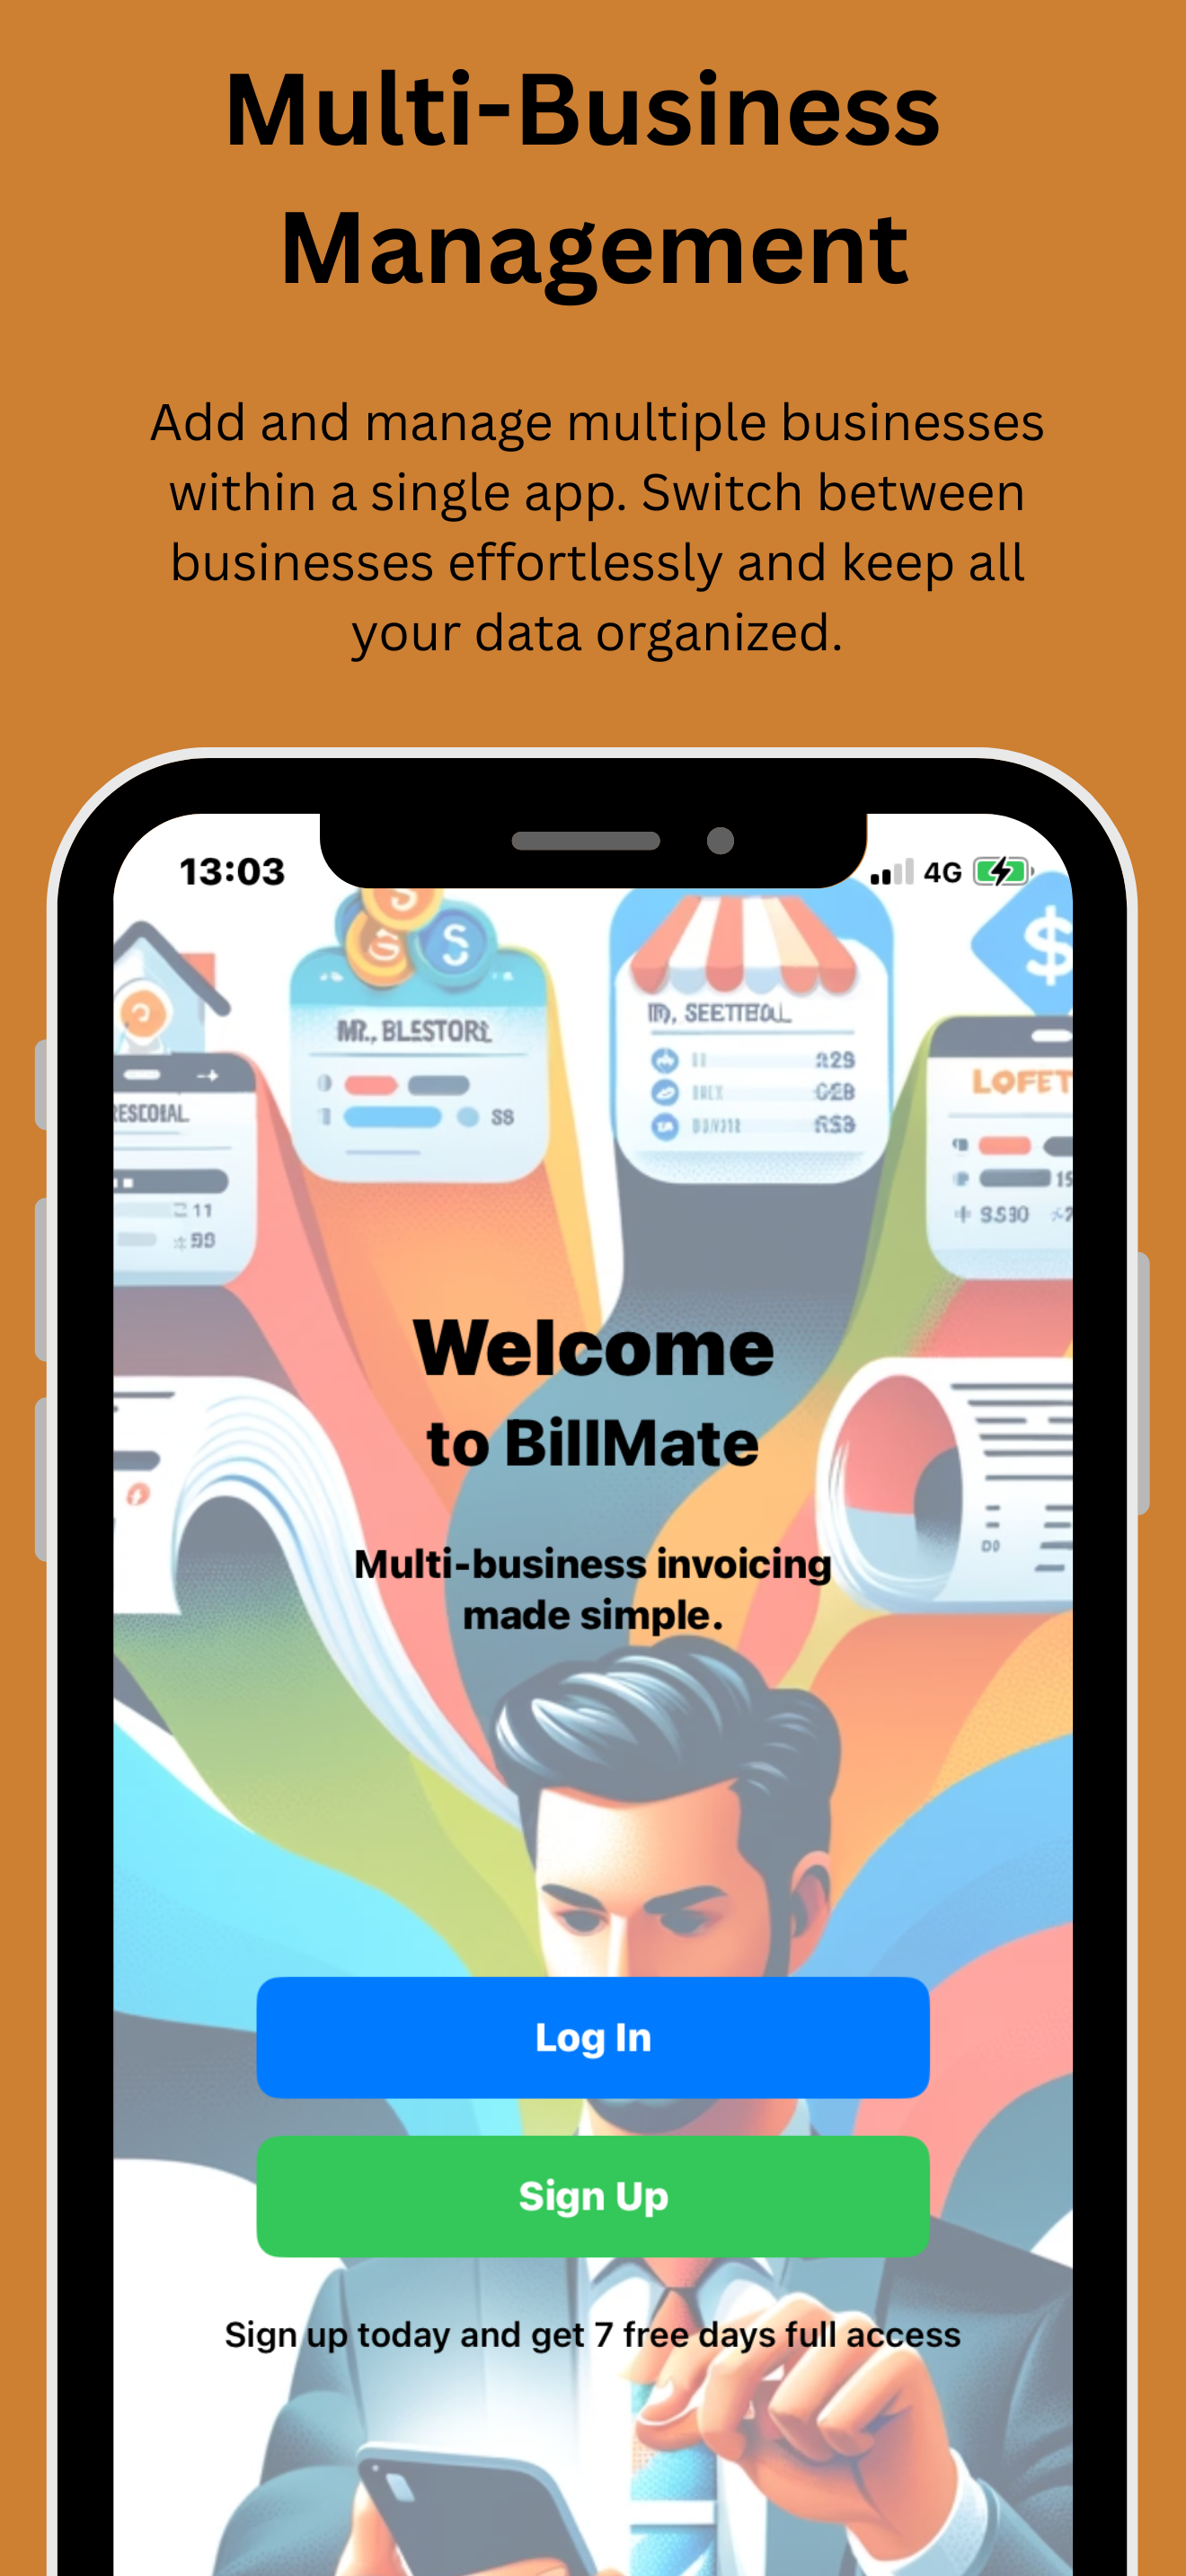
Welcome
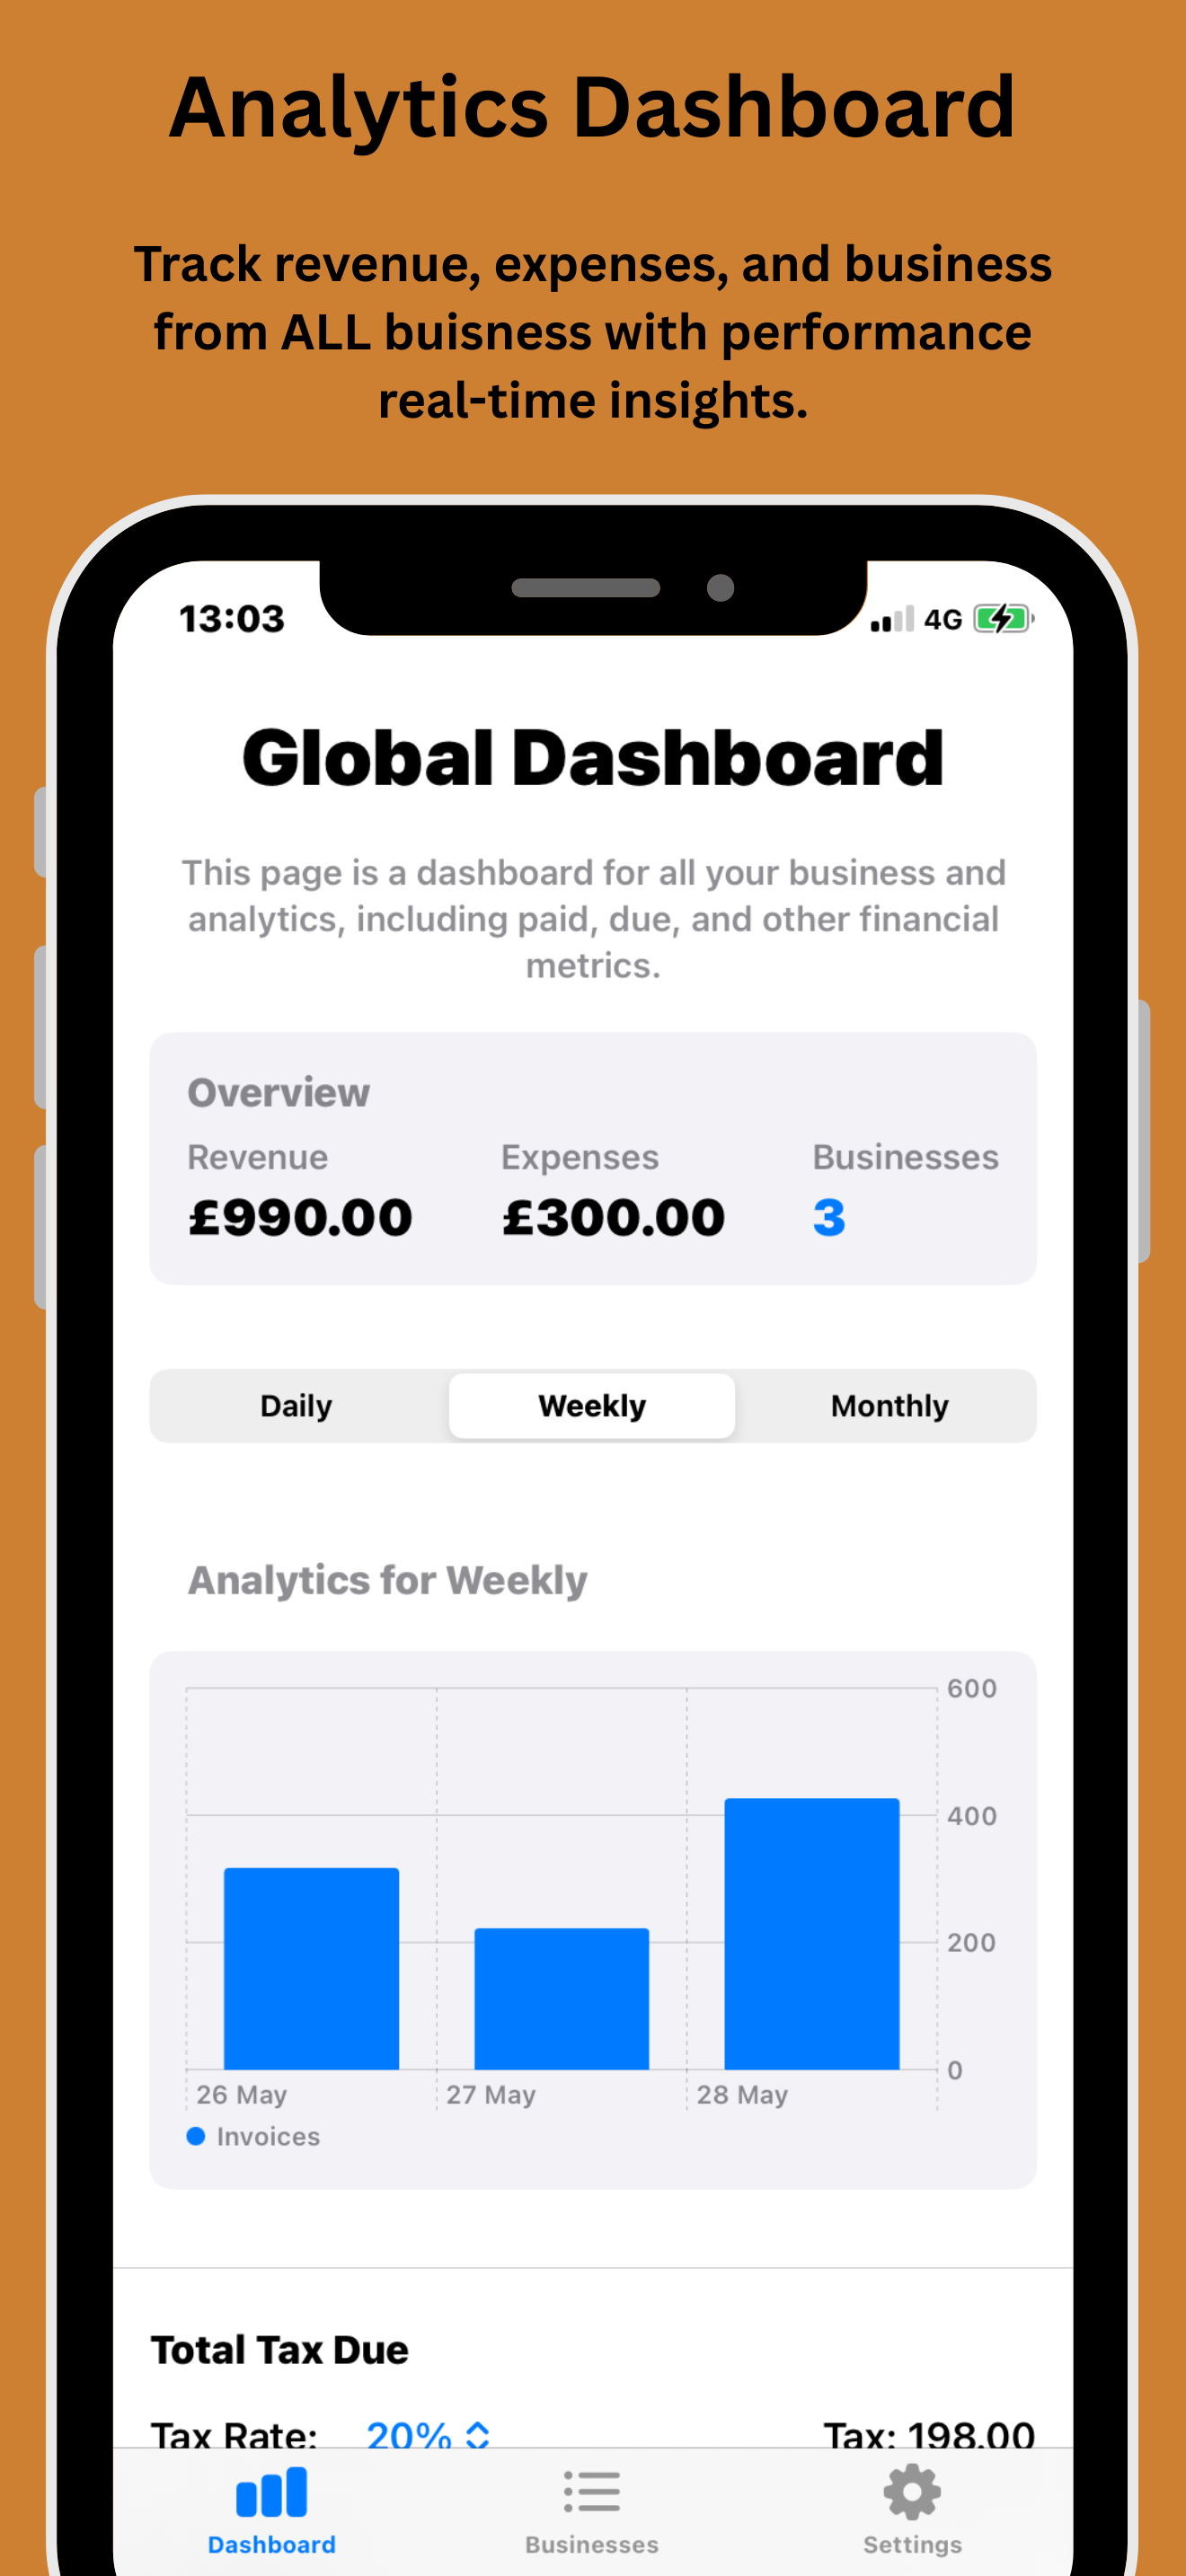
Dashboard
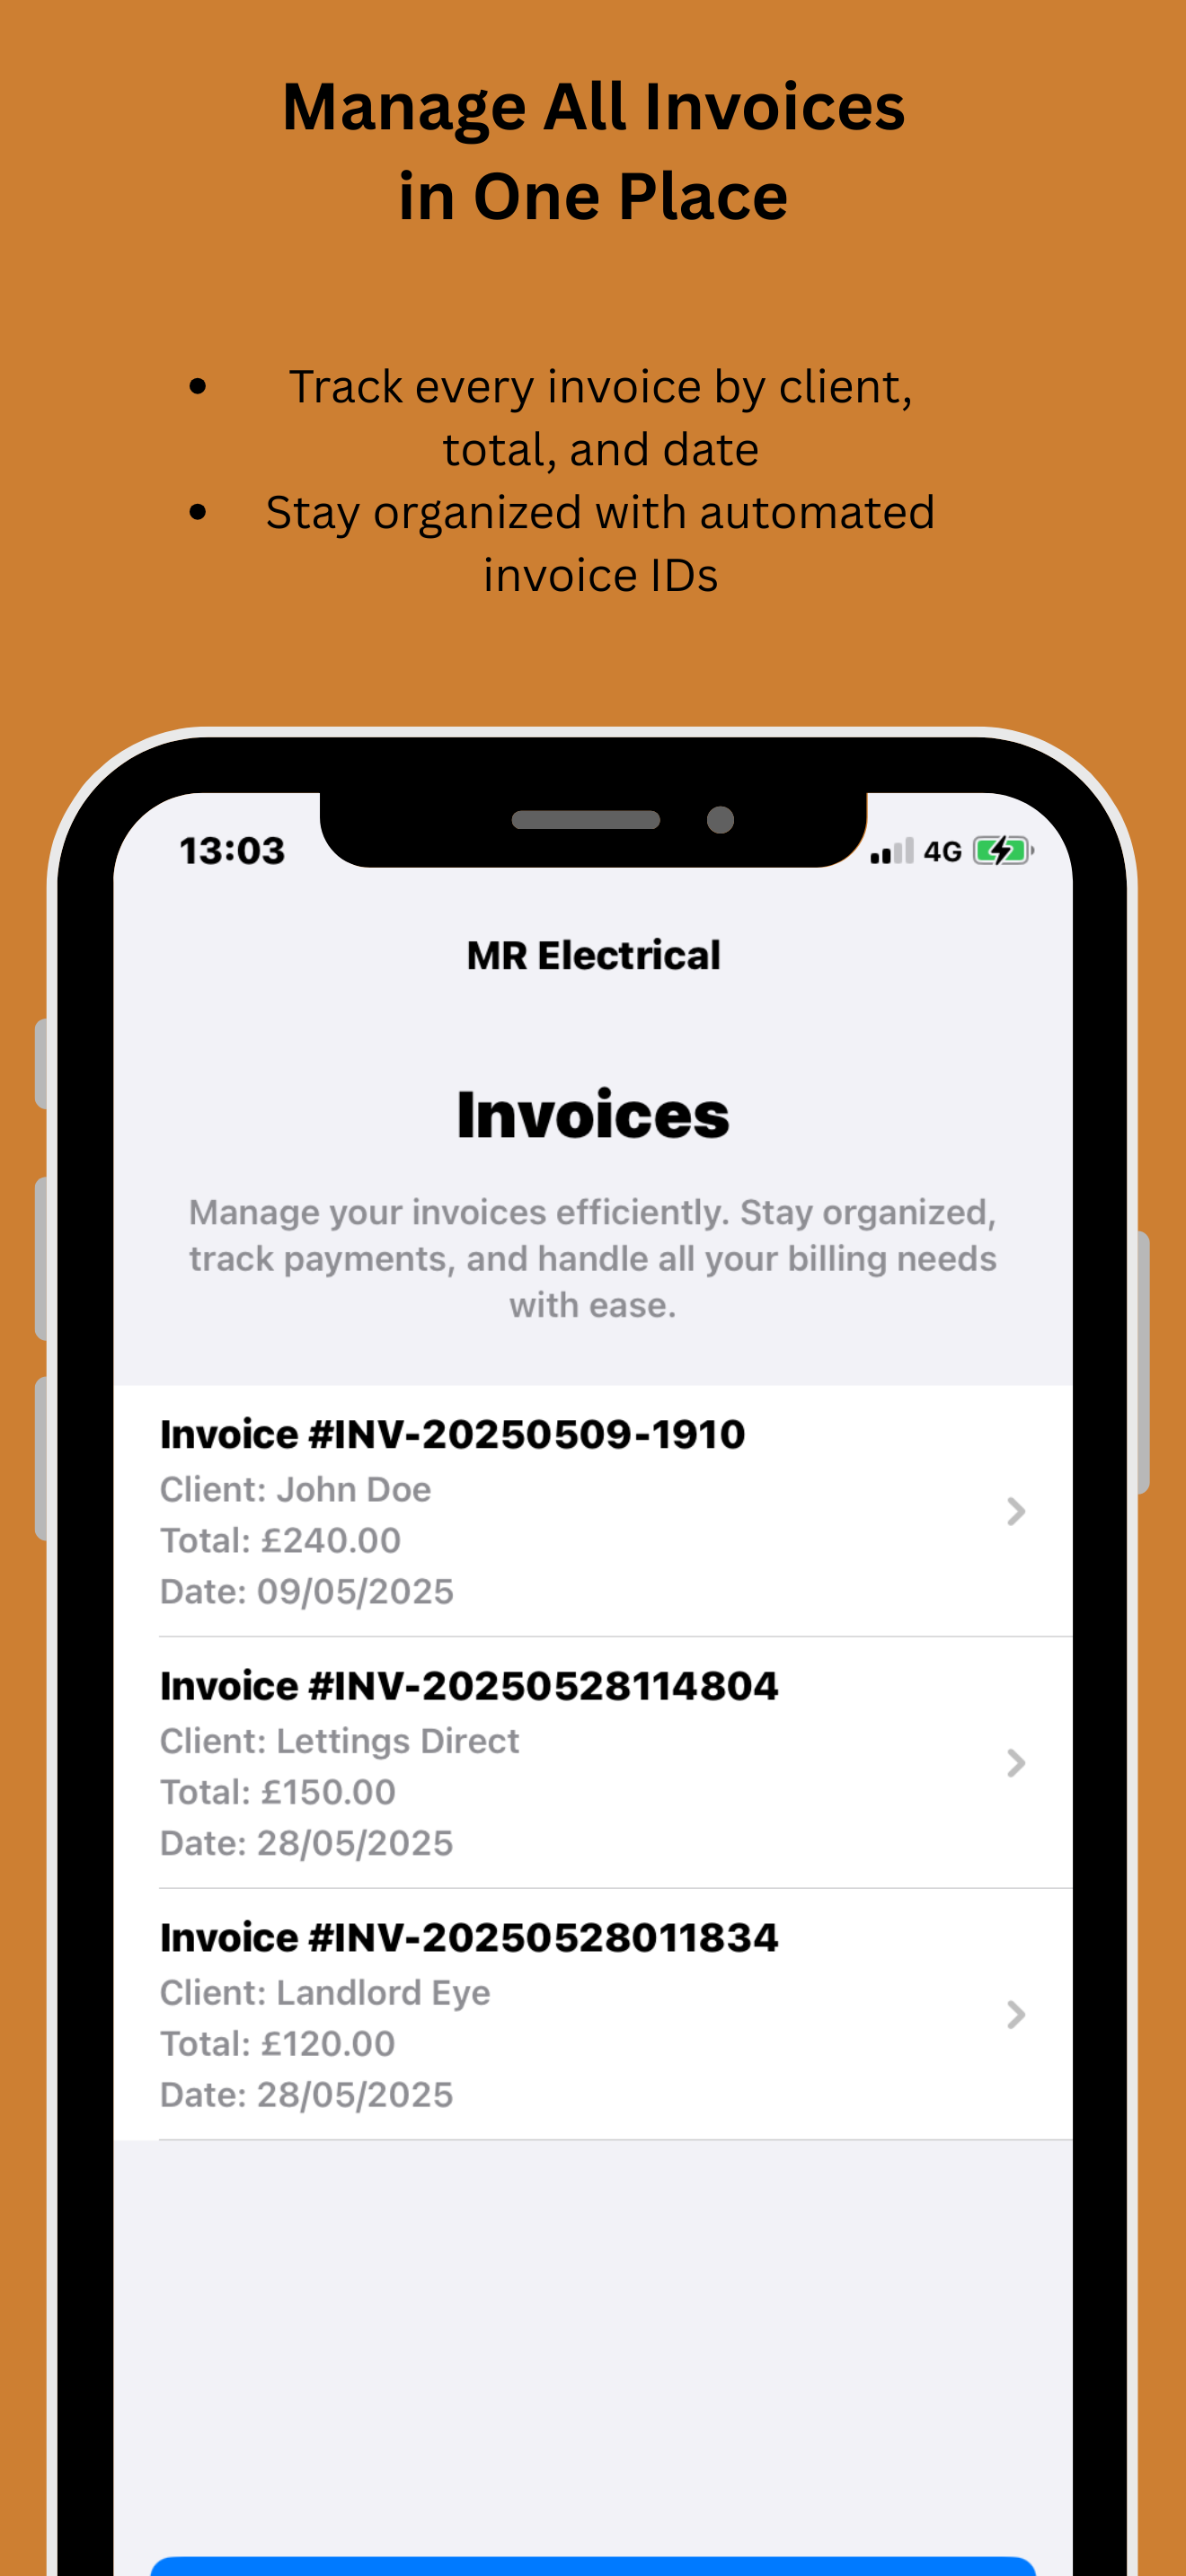
Invoices
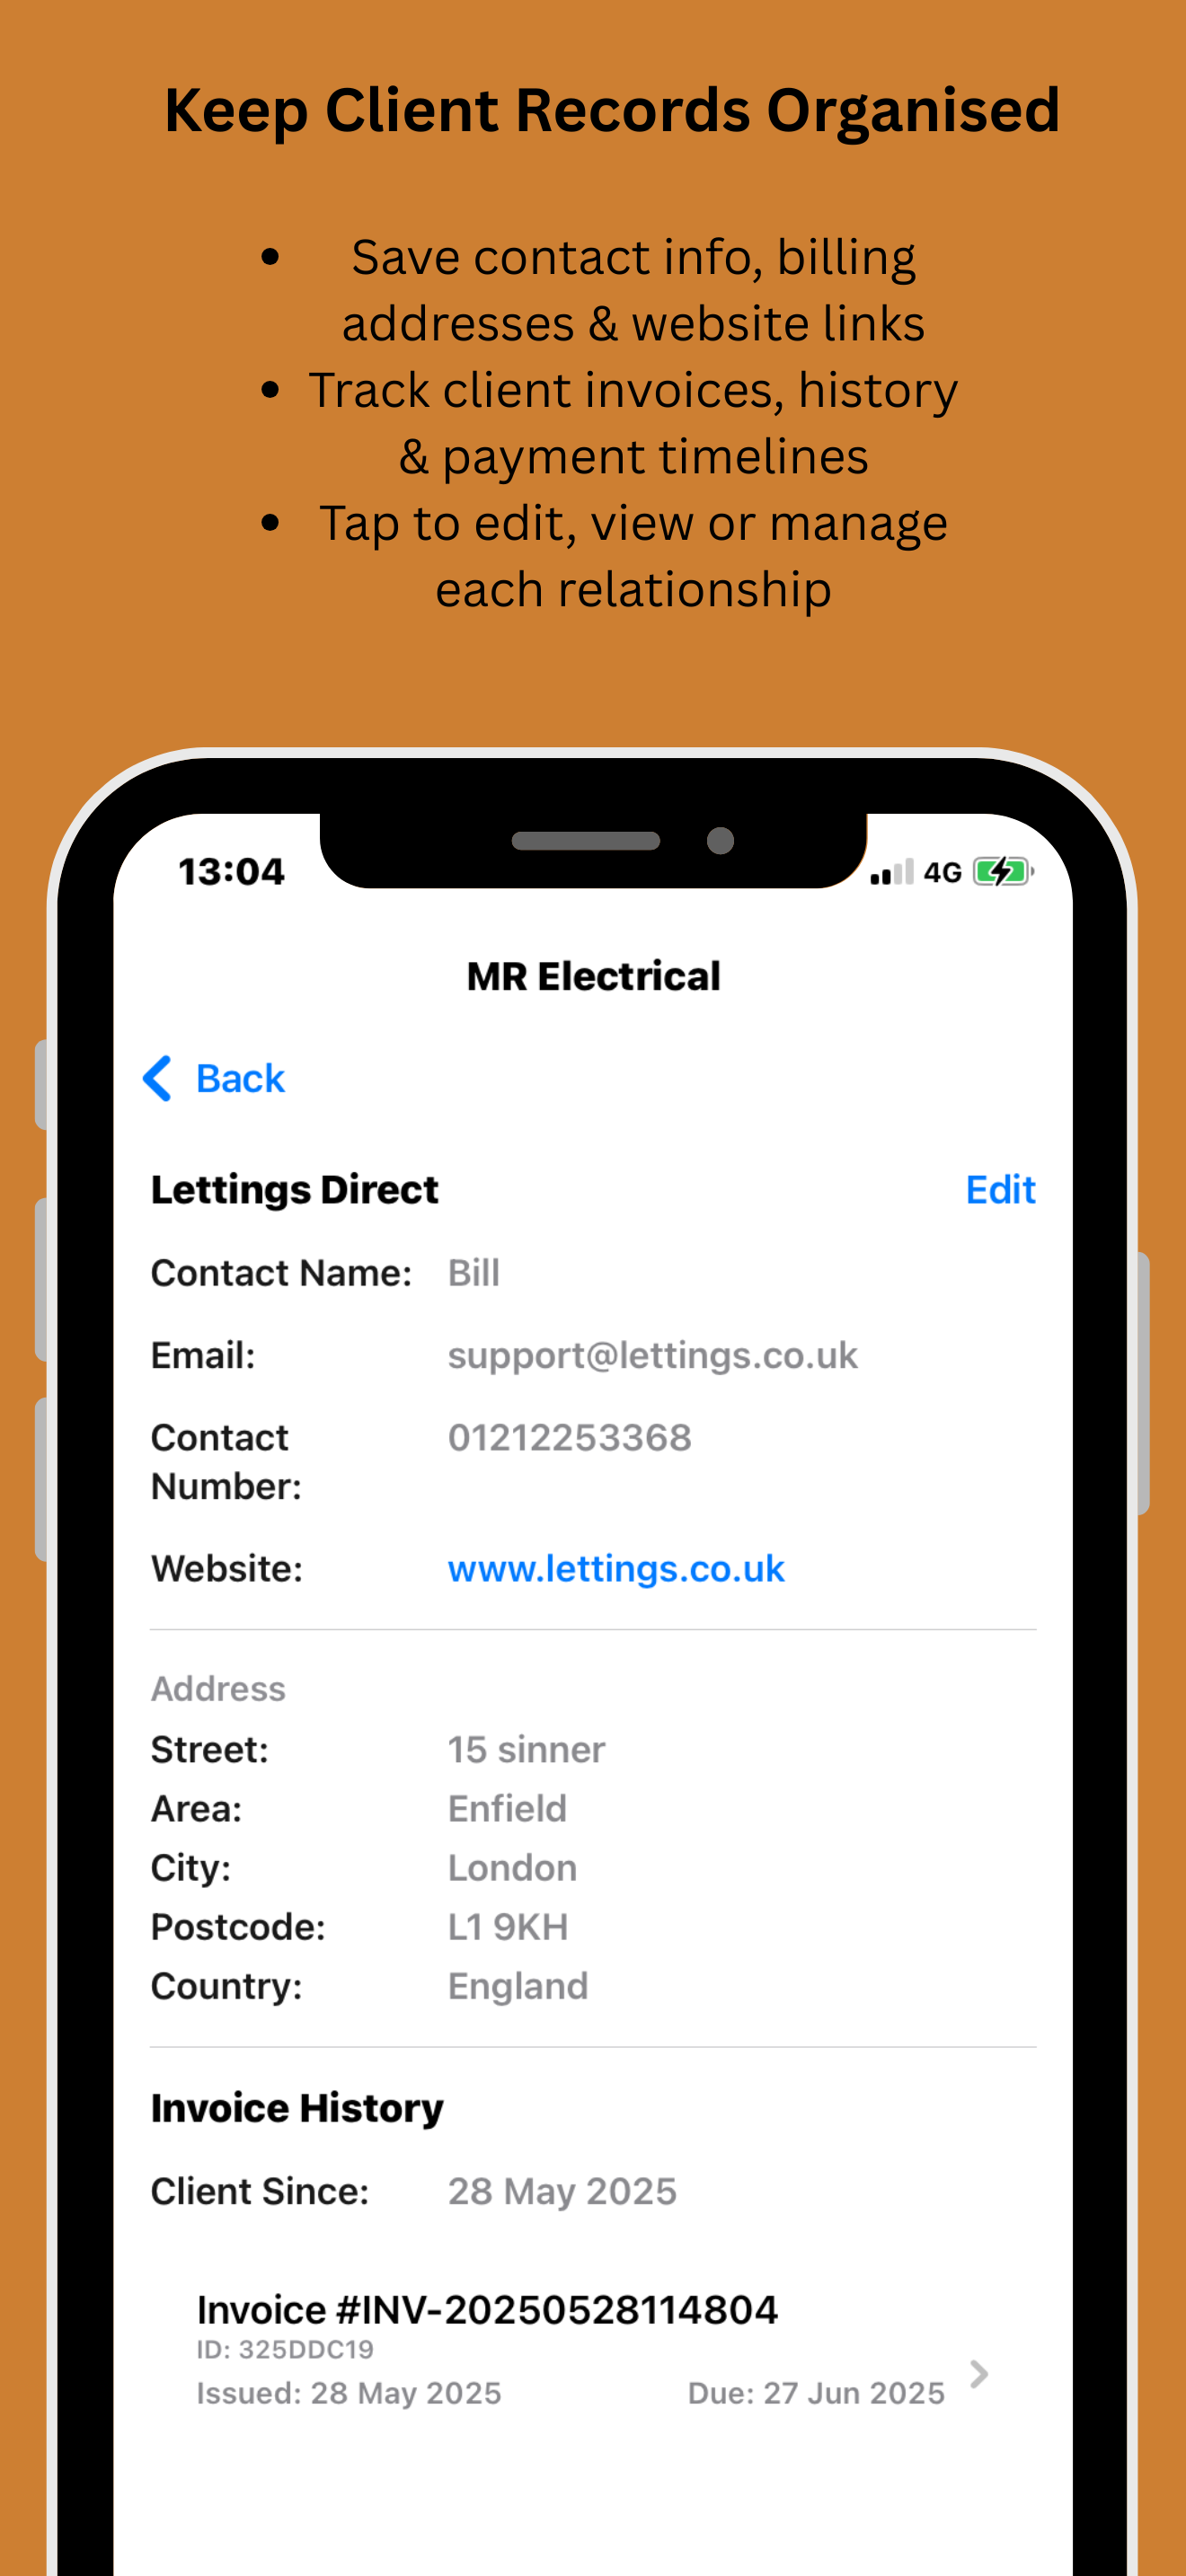
Client CRM
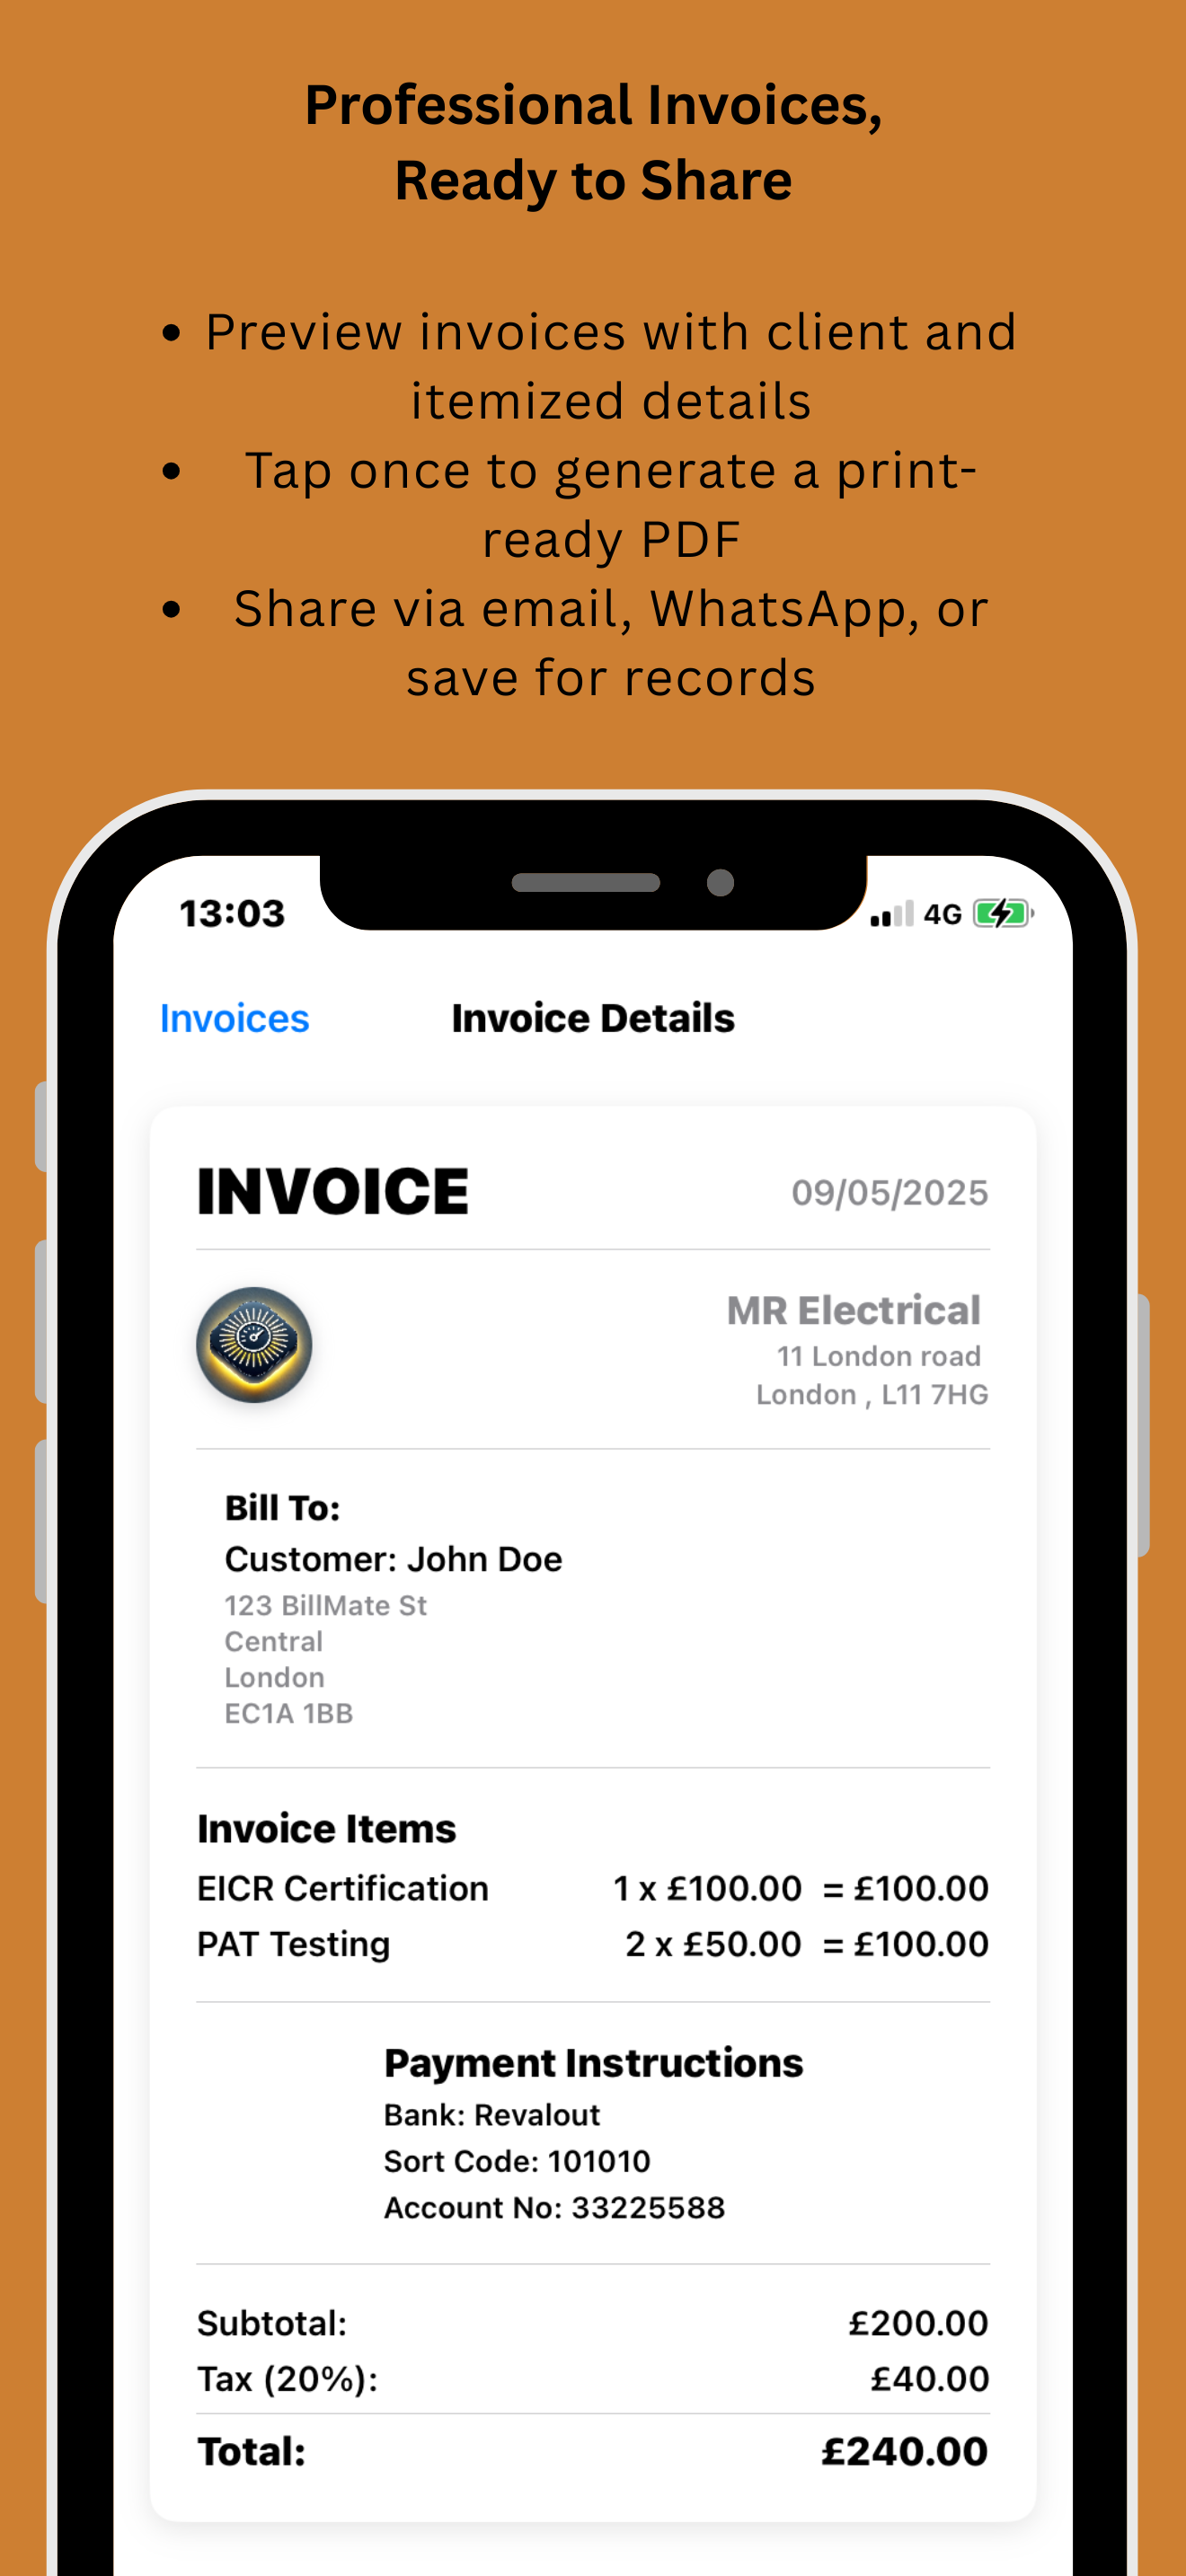
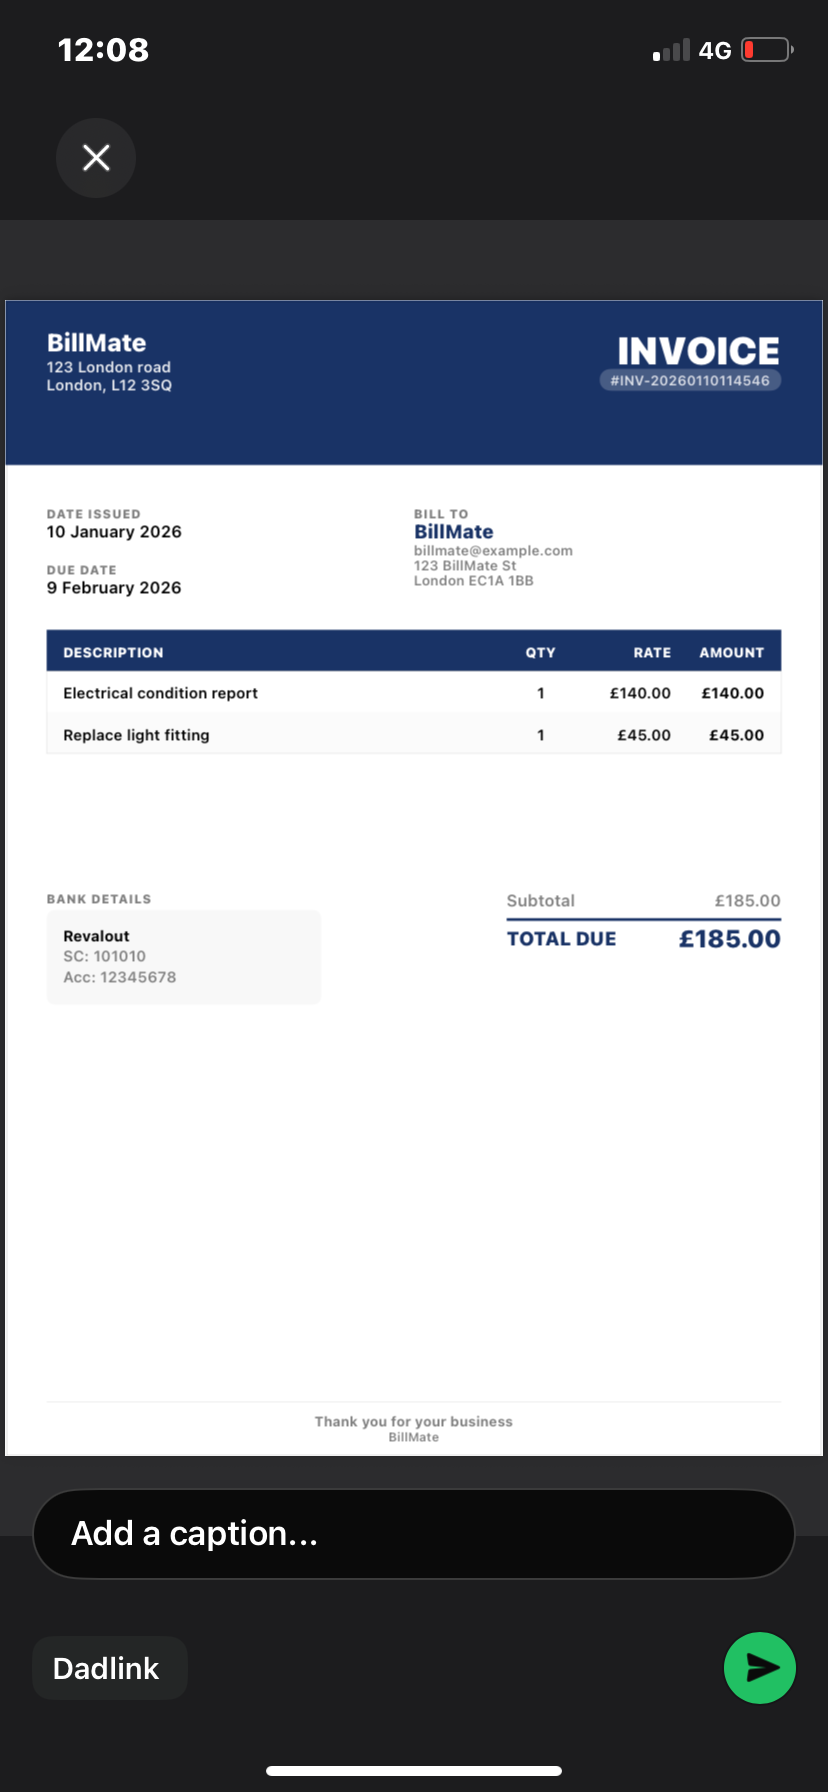
PDF Preview
Follow this simple, step‑by‑step guide to make and send a VAT‑ready invoice from your iPhone with BillMate. You’ll go from your invoice hub to adding a customer, filling in items and bank details, previewing the PDF, and sharing it by email, WhatsApp, Messages, and more.
From creating a client to previewing and sending a professional PDF
Follow the screenshots below to go from your invoice hub to a shared PDF invoice on your iPhone
Open BillMate on your iPhone and go to your invoice hub. This is where you can see all of your invoices in one place and check their status.
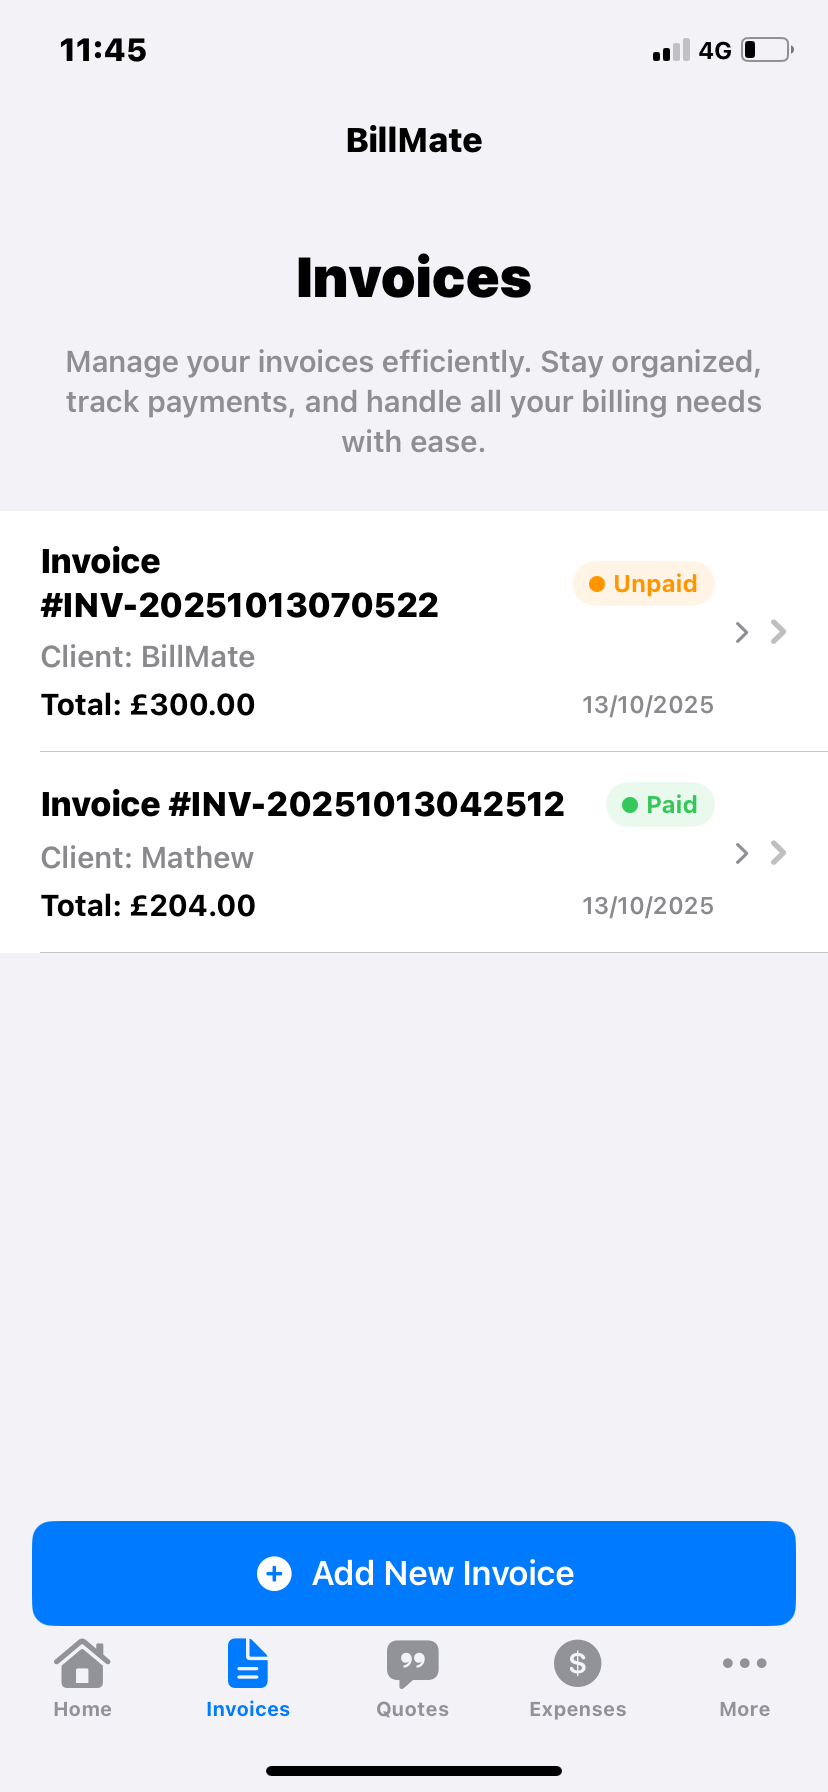
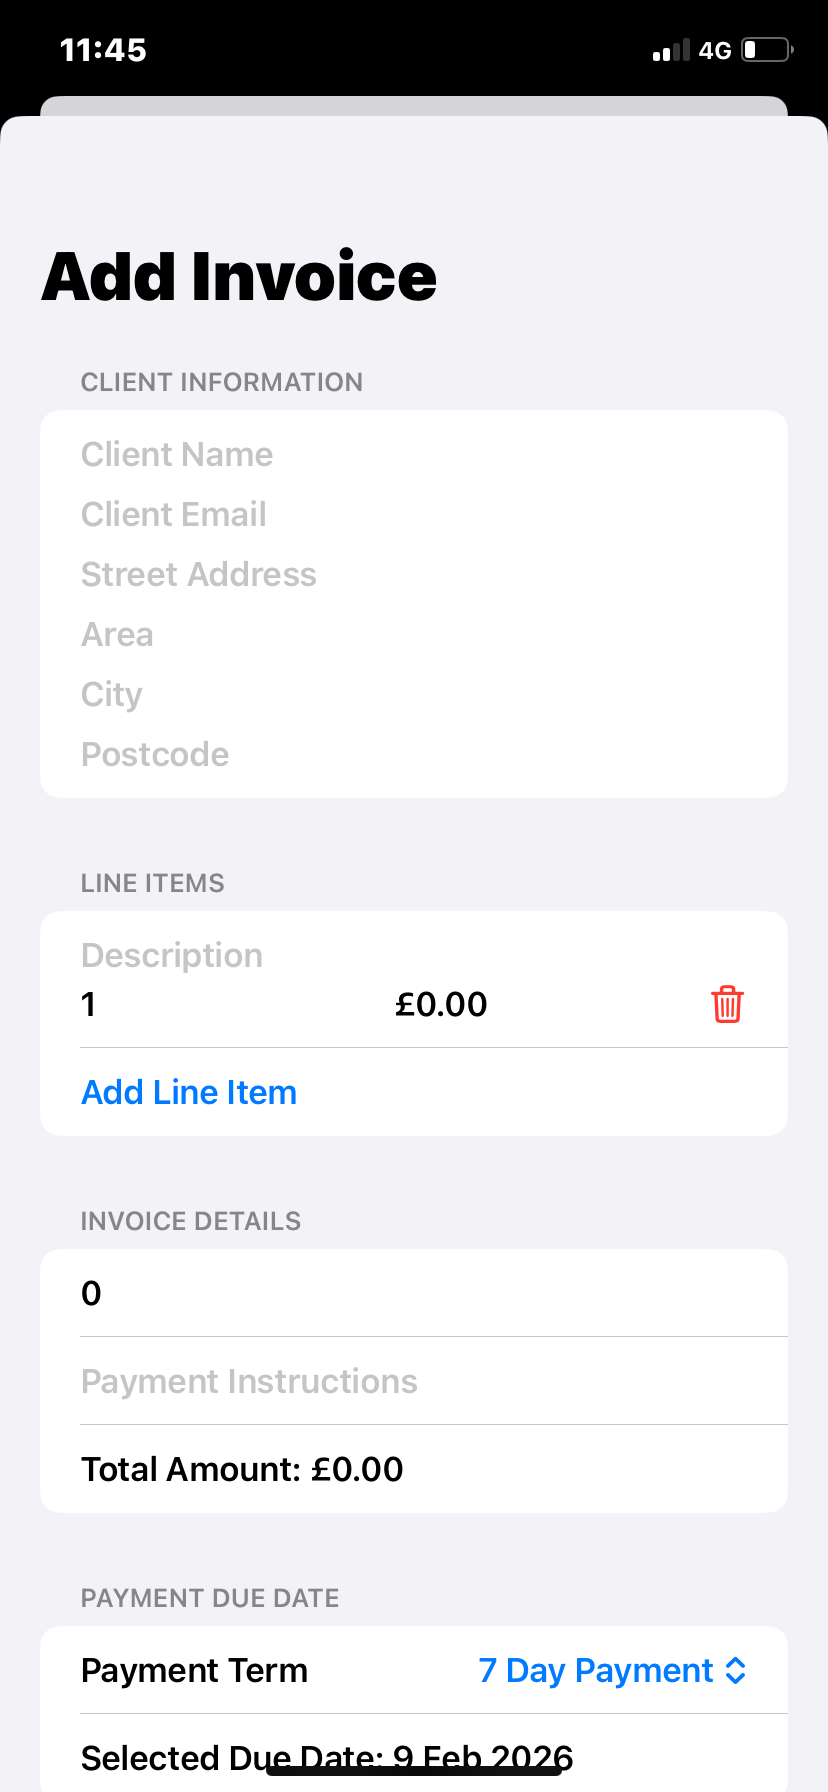
From your invoice hub, tap the Add Invoice button to start a new invoice. This opens a blank invoice ready for your customer and line items.
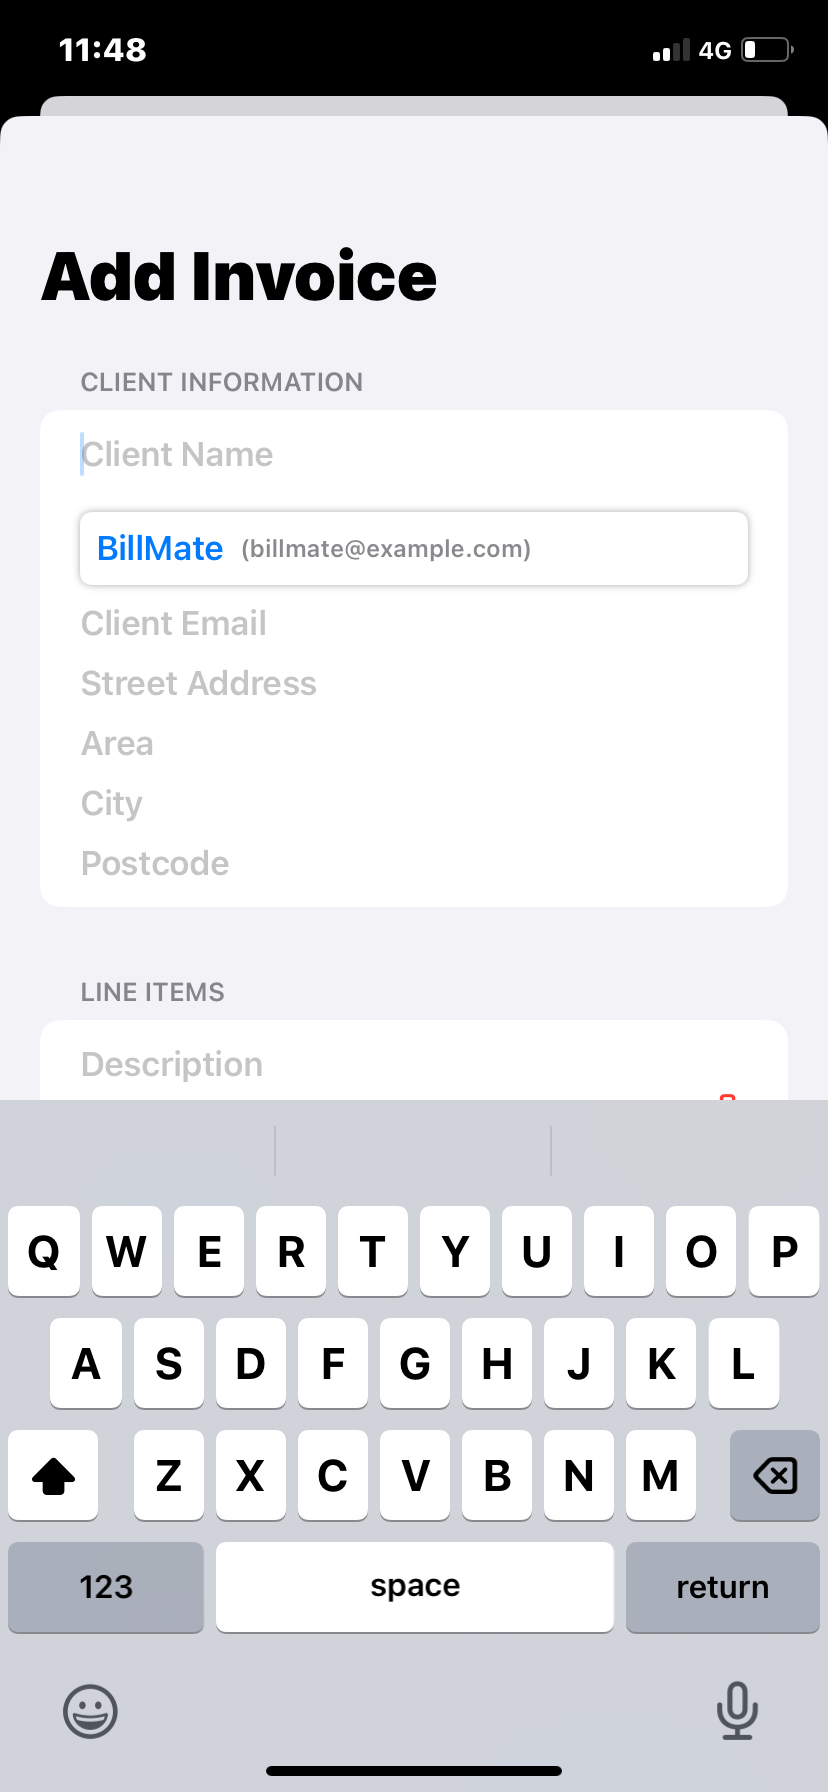
Start typing your customer’s name in the customer field. If you’ve invoiced them before, BillMate will suggest existing customer records so you can select them quickly. If they’re new, just type in their details to add them.
Once the customer is selected, complete any missing contact details if needed. Then add your invoice items: descriptions of the work or products, quantity, and price. BillMate calculates the totals automatically as you go.
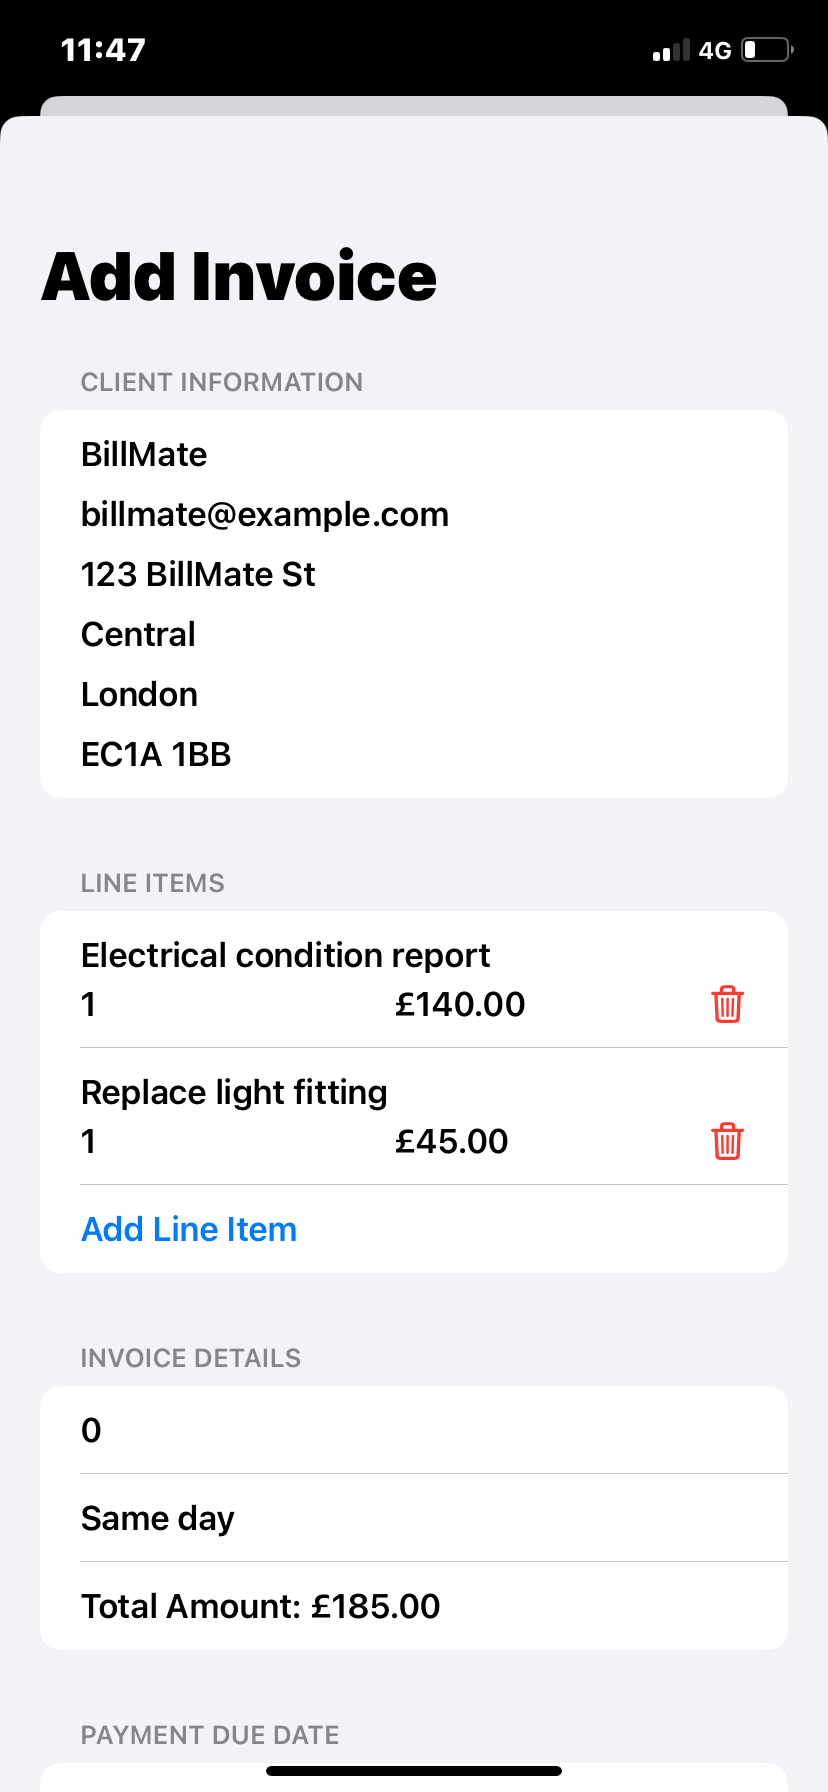
Scroll down to the payment section. If you’ve already added bank details in your business profile, they’ll appear automatically. If not, enter your bank account details here, along with payment terms and a due date so your customer knows exactly how to pay you.
You can also attach photos of the work or documents for the client on this screen.
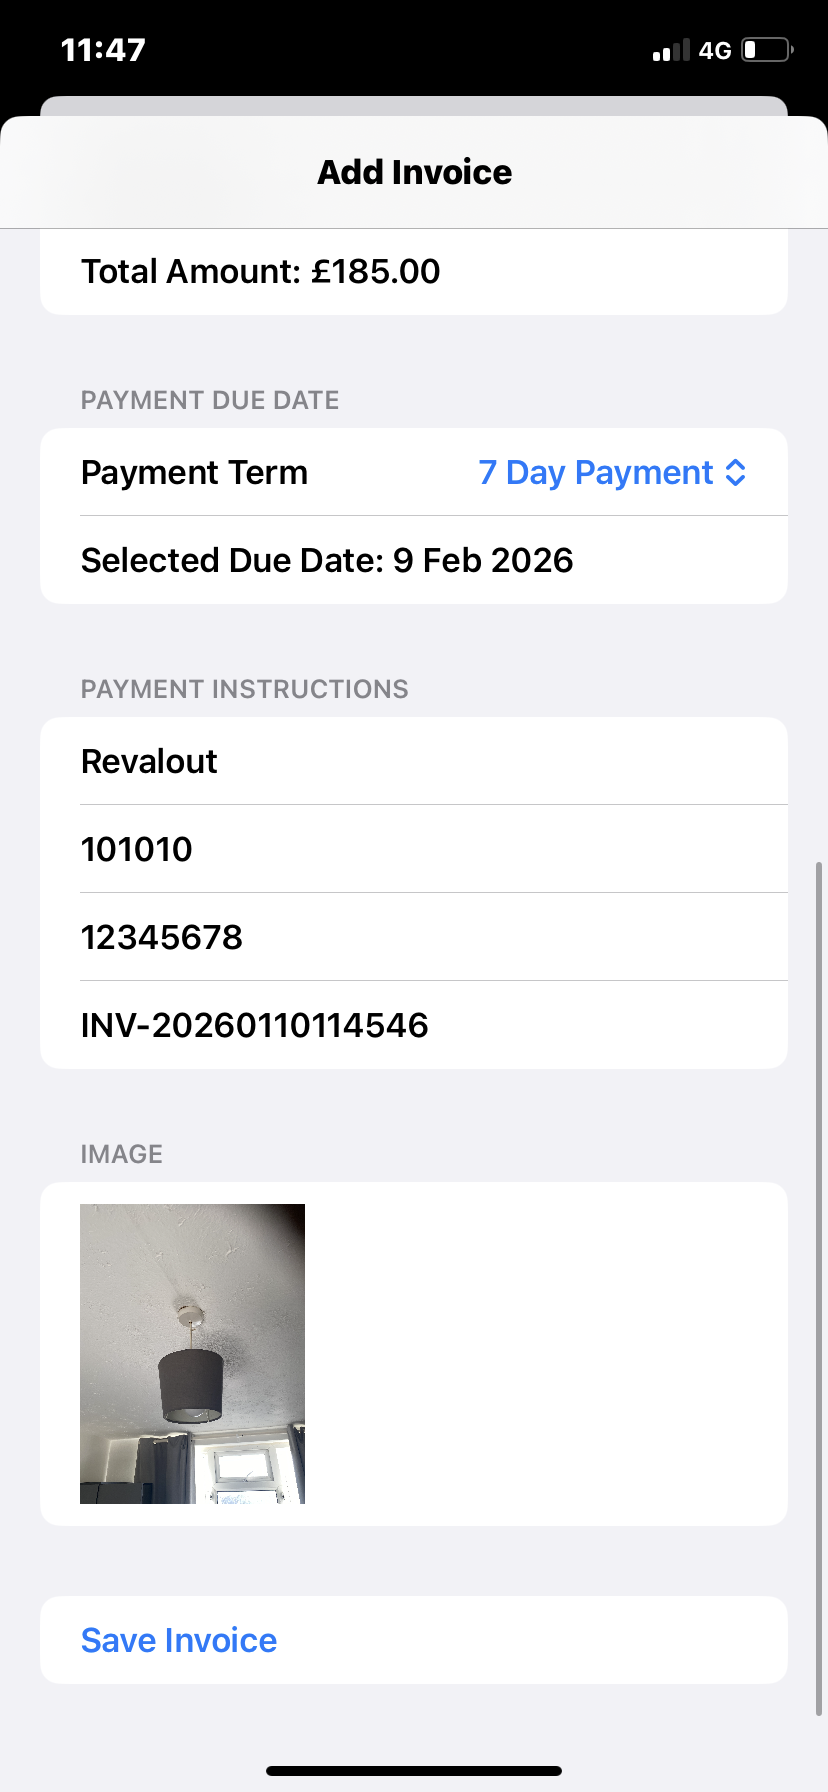
When everything looks correct, tap Save. Your new invoice will now appear back in your invoice hub with its current status (for example, Draft or Sent).
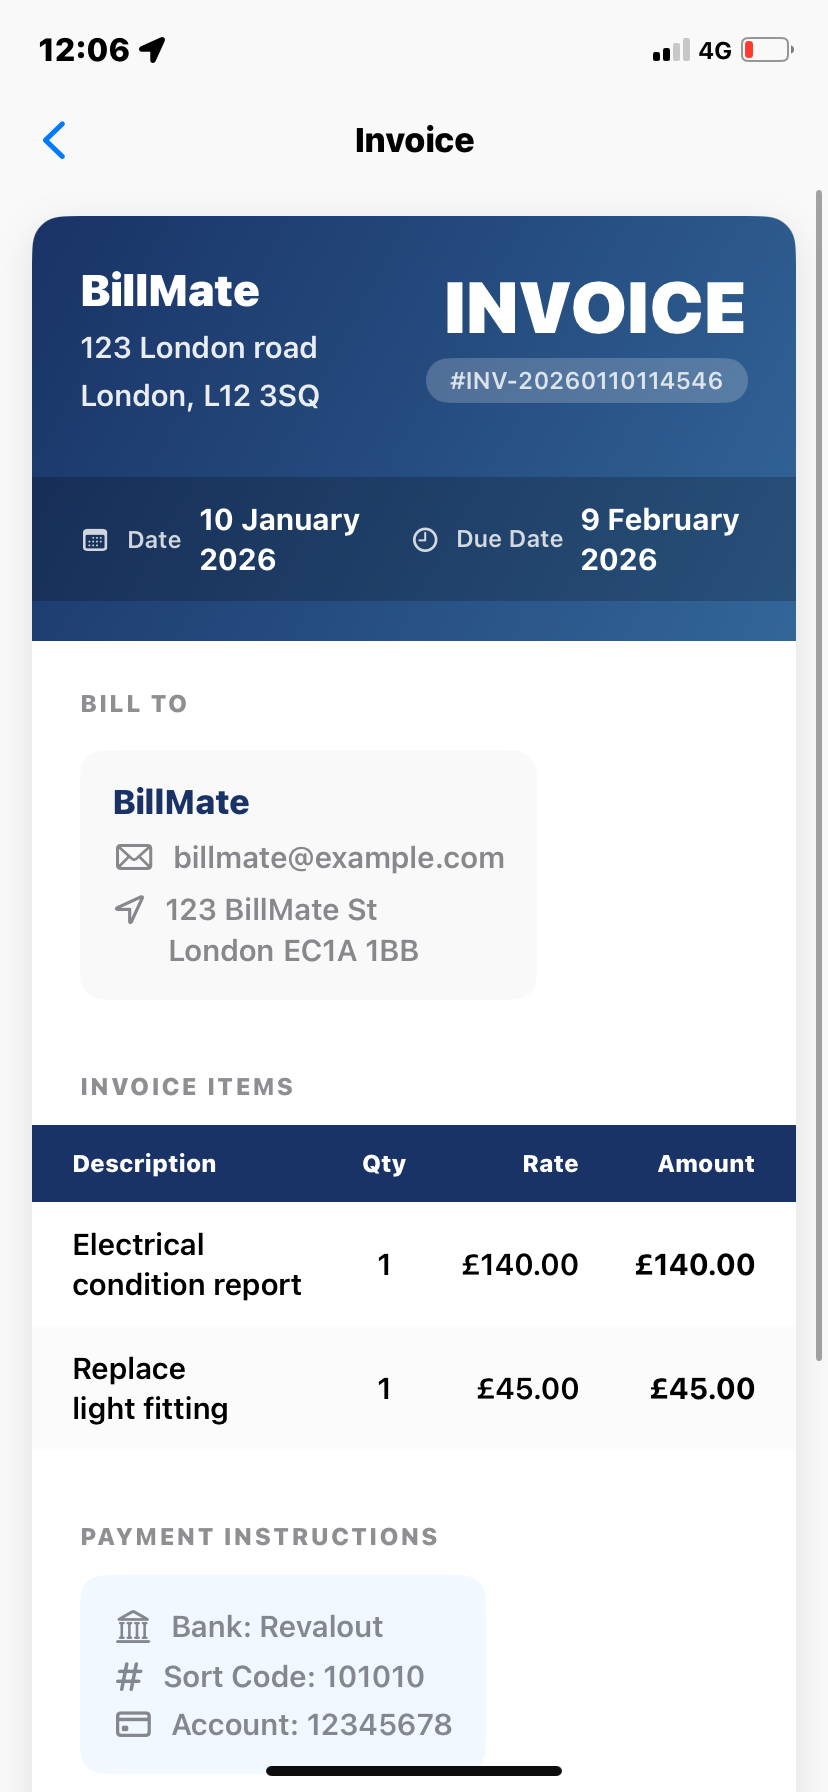
Tap the invoice in your hub to open it, then tap Preview to see the PDF layout. Scroll through the pages to check all details, totals, and bank information are correct before you send it to your customer.
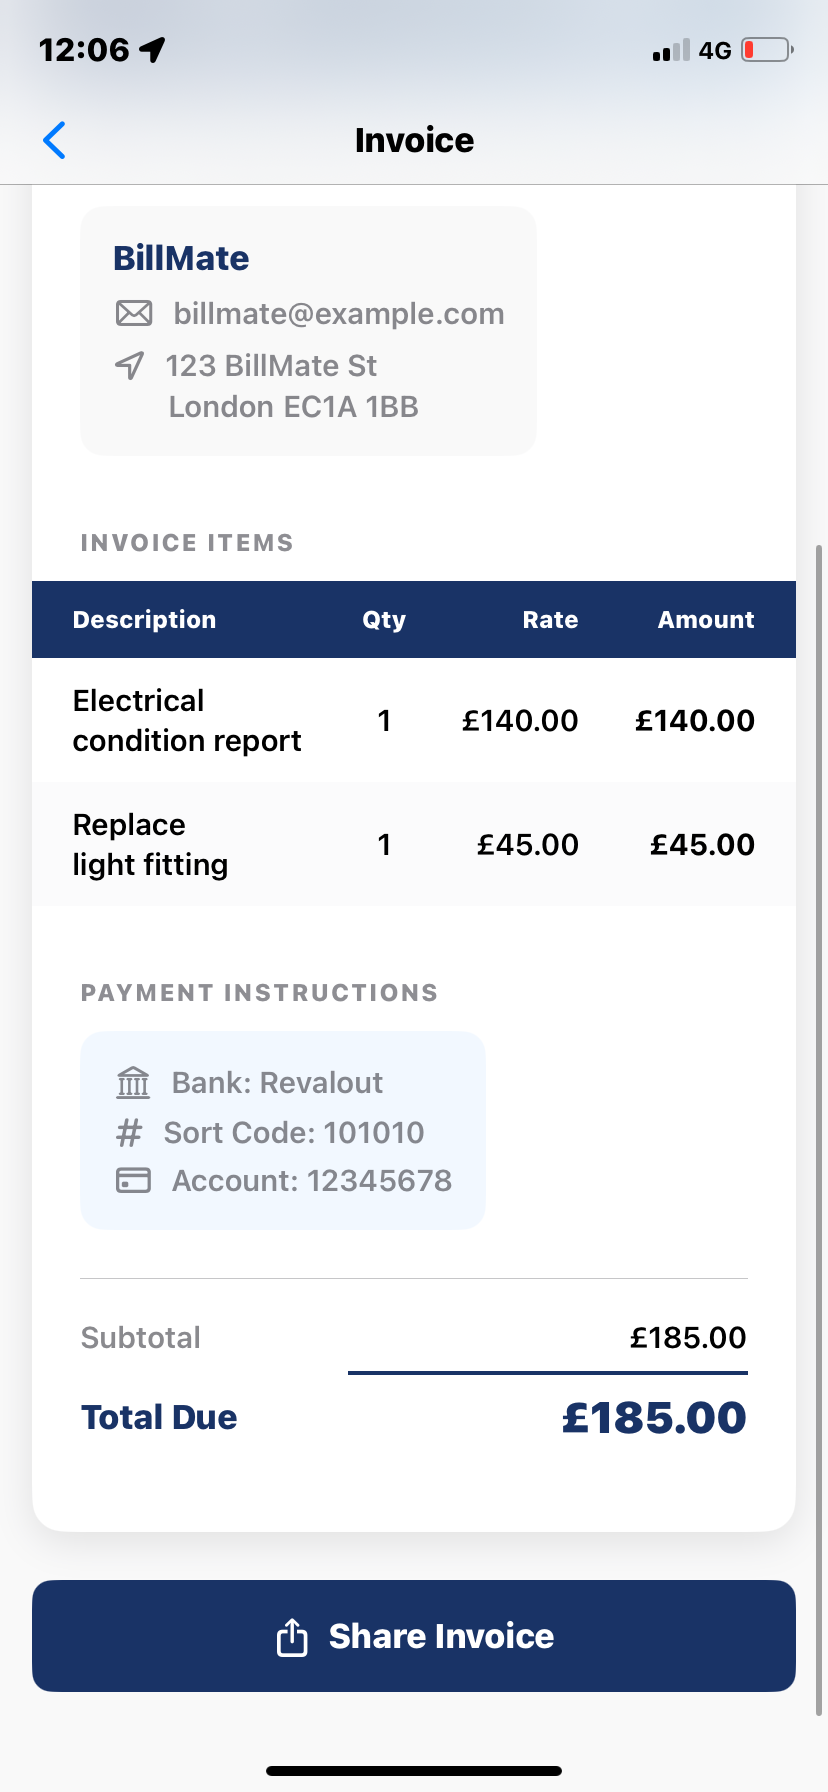
From the preview, tap Share. Choose how you want to send the invoice: email, WhatsApp, Messages, or another app. BillMate sends a full PDF invoice that your customer can open and save for their records.
After you hit send, your customer receives the PDF invoice. You can see the invoice anytime in your invoice hub, track its status, and later mark it as paid when the money arrives in your account.
Fill these correctly for faster approvals and cleaner records
Name, address, contact, logo, VAT number (if registered).
Billing name, address, email; optional site address and contact.
Unique sequence like INV‑2025‑001. Auto‑increment supported.
Issue date and due date—clear timelines reduce delays.
Client PO or job reference speeds finance approvals.
Description, quantity, unit price, VAT/tax, discounts; use notes for clarity.
Subtotal, tax totals, discounts, grand total—calculated for you.
Net X days, late fees, deposits, and milestone references.
Account name, sort code, account number, IBAN/SWIFT, alternatives.
VAT, discounts, and deposits—how totals are built
Service £100 + Parts £50 = Subtotal £150; VAT 20% = £30; Total £180.
Subtotal £200 → Discount £20 → New Subtotal £180; VAT 20% = £36; Total £216.
Deposit invoice £100 → Final invoice later for remaining balance (e.g., £250 − £100 = £150 due).
Line A at 5%, Line B at 20%—BillMate itemises each tax and shows combined totals on the PDF.
Speed up invoicing and avoid common mistakes
Reuse common services/parts to speed up future invoices.
Include PO/job references so client finance teams can approve quickly.
Set payment terms and due dates. Add bank details or payment instructions.
Use BillMate’s legal support tools to handle overdue invoices professionally.
Add site/delivery notes or certification references to match work performed.
Always preview the PDF—check numbers, dates, and references before sending.
In‑depth answers to common invoicing questions
Tap Preview → Share → choose Mail or Messages. You can also save to Files or copy the PDF. Add a short note and include PO/reference in the subject to speed approvals.
Yes, as long as it’s not marked as paid. Update items/terms and resend the PDF. If already paid, issue a credit note or an additional invoice.
Open the invoice → Mark as Paid. Add a note (e.g., payment method, reference). Optionally share a paid confirmation.
Yes. Create quotes, send for approval, then convert to invoices. For deposits, issue a deposit invoice first, then bill the remaining balance.
Use Net 7/14/30, due on receipt, or milestone terms. Include late fees, bank/IBAN/SWIFT, and remittance info.
Add line‑level or overall discounts with a note explaining eligibility. For tax‑exempt sales, set VAT to 0% and include an exemption note if required.
INV‑YYYY‑### (e.g., INV‑2025‑042). Year prefixes help reporting. BillMate auto‑increments to avoid duplicates.
Yes. Add site or delivery notes per invoice or per line item to match client requirements.
Use deposit and final invoices or track partial payments with notes. Mark as Paid when the balance is settled.
Download the iOS app to invoice on the go or sign up to the online CRM to manage from the web.